n8n Unleashed: Deploy Your Automation Engine – From Localhost to Cloud Power
So you’ve discovered n8n. Great! You’re ready to automate your work, connect your apps, and build workflows that run while you sleep. But first, you need a home for your automation engine. A place where it can live, breathe, and execute your brilliant plans 24/7.
This guide is your roadmap. We’ll explore every hosting option available for n8n, from the simplicity of running it on your laptop to the power of dedicated cloud servers. You’ll get clear comparisons, practical setup steps, and everything you need to make an informed decision. Let’s find the perfect foundation for your automation journey.
Part 1: The n8n Engine – Understanding What You’re Hosting
Before choosing a home, let’s understand the tool itself. n8n (pronounced “n-eight-n”) is a fair-code licensed workflow automation platform. Think of it as a visual programming tool where you connect different apps and services using a node-based editor. It’s incredibly powerful yet accessible, designed for both technical and non-technical users.
Core Concepts You’re Hosting:
- Workflows: These are your automation blueprints. A workflow is a visual sequence of steps (nodes) that defines a complete process, like “When a new row is added to this Google Sheet, send a formatted email and log it to Airtable.”
- Nodes: The fundamental building blocks. Each node performs one specific task—triggering an event, sending an HTTP request, processing data, or connecting to a service like Slack, Notion, or your database.
- Triggers: Special nodes that kick-start your workflows. They can be scheduled (e.g., “run at 9 AM every Monday”), reactive (e.g., “when a webhook is called”), or manual.
- Executions: Every time a workflow runs, it creates an execution log. This is your audit trail, showing exactly what data passed through each node, success status, and any errors—crucial for debugging and monitoring.
Why Hosting Matters: Your choice of hosting directly impacts the reliability, accessibility, and power of these components. A workflow built on your laptop dies when you close it. A workflow hosted in the cloud runs independently, enabling true “set it and forget it” automation. The environment you choose dictates uptime, security, maintenance burden, and scalability.
Part 2: The Hosting Landscape – Your Four Main Choices
Choosing where to run n8n is your first critical decision. Each path offers a different balance of control, cost, and complexity. Let’s break down the four primary avenues.
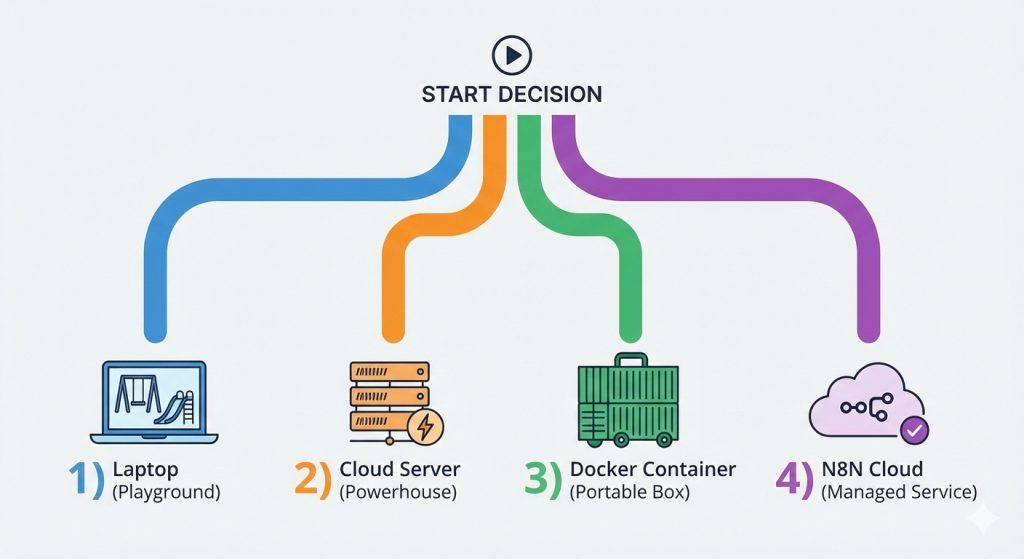
1. Local Development: The Personal Playground
This is the starting point for most users. You install n8n directly on your personal computer (Windows, macOS, or Linux). It’s the ultimate sandbox for learning, experimentation, and building workflows in a safe, private environment.
- How to Set It Up: The simplest method uses Node.js and npm (Node Package Manager). Once Node.js is installed, you open your terminal or command prompt and run two commands:bashnpm install n8n -g n8n startWithin seconds, n8n is running. You access the editor by opening your web browser and navigating to
http://localhost:5678. - The Pros:
- Zero Cost: Completely free to use.
- Total Privacy: Your data never leaves your machine.
- Instant Setup: Get started in under 5 minutes.
- Offline Capable: Build workflows without an internet connection.
- The Cons & Limitations:
- Not Always On: Workflows stop when you shut down your computer or put it to sleep.
- No External Access: You can’t trigger workflows from webhooks outside your local network (like from a public form).
- Resource Dependent: Ties up your computer’s CPU and memory.
Verdict: Perfect for beginners, testing, and development. A necessary first step, but insufficient for production automations that need reliability.
2. Cloud Server: The Professional Powerhouse
For serious, reliable automation, a cloud server is the gold standard. You rent a virtual private server (VPS) from a provider like DigitalOcean, Linode, AWS, or Google Cloud and install n8n on it. This server runs 24/7, independently of your personal devices.
- How to Set It Up (The Easiest Path): The absolute simplest method is using a 1-Click App. Providers like DigitalOcean offer pre-configured server images.
- Create an account with DigitalOcean.
- Click “Create Droplet.”
- Go to the “Marketplace” tab and search for “n8n.”
- Select the n8n 1-Click App image.
- Choose an affordable plan (the basic $6/month plan is often enough to start).
- Choose a data center region and finalize creation.
- In about 55 seconds, your server is ready. Access n8n at
http://YOUR_SERVER_IP_ADDRESS:5678.
- The Pros:
- 24/7 Uptime: Your automations run continuously, rain or shine.
- Global Accessibility: Access your n8n editor and trigger workflows from anywhere.
- Webhook Friendly: Receive triggers from external services (Stripe, GitHub, forms).
- Scalable: Easily upgrade server resources (CPU, RAM) as your needs grow.
- Professional & Reliable: Suitable for business-critical workflows.
- The Cons:
- Monthly Cost: Starts around $6-$10 per month.
- Basic Maintenance: You are responsible for server updates, security patches, and backups. (The 1-Click app simplifies much of this).
Verdict: The best value and most common choice for individuals, small businesses, and serious enthusiasts who need reliable, always-on automation.
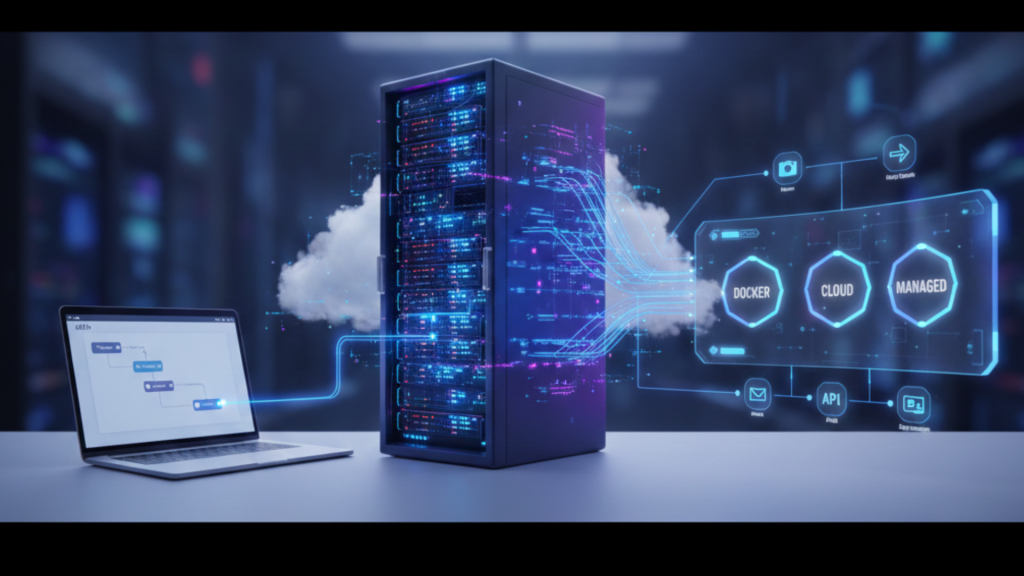
3. Docker Containers: The Portable Package
Docker packages n8n and all its software dependencies into a single, lightweight container. This container runs consistently on any system that has Docker installed—your laptop, a cloud server, or even a Raspberry Pi.
- How to Set It Up:
- Install Docker Desktop on your machine.
- Run a single command in your terminal:bashdocker run -d \ –name n8n \ -p 5678:5678 \ -v ~/.n8n:/home/node/.n8n \ n8nio/n8nThis command pulls the official n8n image, runs it in the background (
-d), maps port 5678, and creates a volume to persist your workflow data.
- The Pros:
- Consistency & Isolation: Eliminates “it works on my machine” problems. The environment is identical everywhere.
- Easy Updates: Update n8n by pulling the latest image:
docker pull n8nio/n8n. - Clean Management: Removes cleanly without leaving files scattered on your system.
- The Cons:
- Learning Curve: Requires understanding basic Docker concepts (images, containers, volumes).
- Indirect Hosting: Docker is a method of running n8n, not a hosting environment itself. You still need to run Docker on a local machine or, more commonly, a cloud server.
Verdict: Ideal for developers, tech-savvy users, and deployment scenarios where consistency across different environments is crucial. Often used on top of a cloud server for optimal deployment.
4. n8n.cloud: The Fully Managed Service
This is n8n’s own official hosting platform. It’s a Software-as-a-Service (SaaS) offering where the n8n team handles everything: servers, updates, security, backups, and scaling. You just log in via your web browser and build.
- How to Set It Up: Simply sign up for an account at n8n.cloud. There’s no installation—you’re ready to build immediately.
- The Pros:
- Zero Maintenance: No server management whatsoever.
- Maximum Convenience: The fastest way to get started with a production-ready instance.
- Built-in Features: Often includes easier team collaboration, managed credentials, and premium support.
- High Reliability: Managed by the creators of n8n.
- The Cons:
- Recurring Subscription Cost: The most expensive option, priced per month per user or execution.
- Less Control: You cannot customize the underlying server environment or install specific software.
Verdict: The best choice for teams, companies, and individuals who prioritize convenience and have a budget to avoid any infrastructure management.
Quick-Start Decision Matrix
| Hosting Type | Best For… | Ideal User Profile | Approx. Cost | Effort Required |
|---|---|---|---|---|
| Local Dev | Learning & Prototyping | Beginner, Hobbyist | Free | Very Low |
| Cloud Server | Reliable, 24/7 Automation | Prosumer, Small Business, Developer | $6 – $50+/month | Medium |
| Docker | Consistent, Developer-Friendly Deployments | Developer, DevOps Engineer | (Host Dependent) | Medium-High |
| n8n.cloud | Ultimate Convenience & Team Use | Team Lead, Non-Technical User, Company | Subscription Based | Very Low |
Part 3: Your First “Always-On” Automation – A Step-by-Step Project
Let’s put theory into practice. We’ll deploy n8n on a cloud server using DigitalOcean and build a useful, real-world workflow that demonstrates true automation.
Phase 1: Deploying n8n in Minutes
- Sign Up & Deploy: Follow the 1-Click App steps outlined in the Cloud Server section above. Select the basic plan.
- Access & Secure: Once your Droplet is running, note its public IP address. Open your browser and go to
http://YOUR_IP:5678. You’ll be guided through the initial user setup—be sure to set a strong password! - Configure for Access (Optional but Recommended): For better security, consider:
- Adding a Domain: Point a domain name (like
n8n.yourcompany.com) to your server’s IP. - Setting up HTTPS: Use Let’s Encrypt and a reverse proxy (like Nginx) to encrypt traffic. Many 1-Click apps have guides for this.
- Adding a Domain: Point a domain name (like
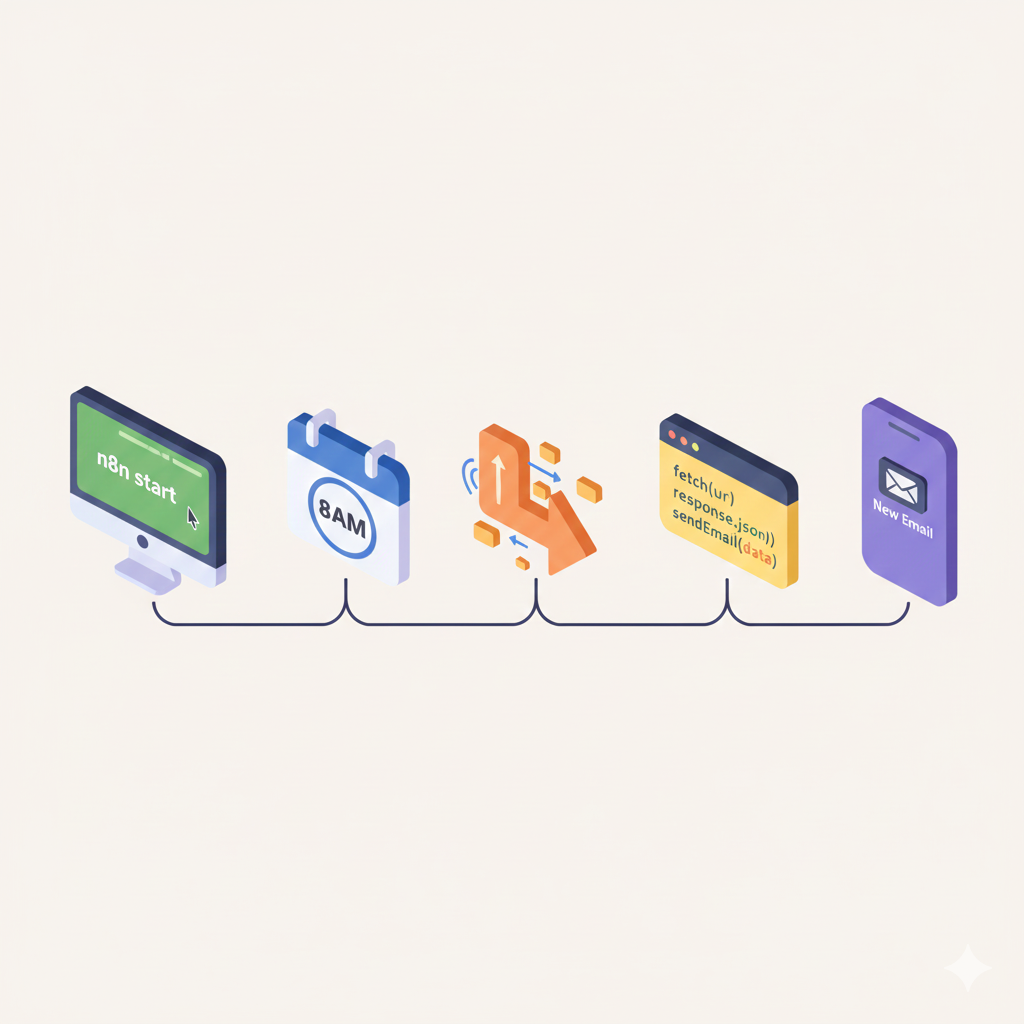
Phase 2: Building a Practical Workflow – The Daily Digest
We’ll create a workflow that runs automatically every morning, fetches the top tech news headline, and sends it to you via email.
- Add the Trigger: In your n8n editor, drag and drop a “Schedule Trigger” node. Configure it to run every weekday at 8:00 AM.
- Fetch Data: Add an “HTTP Request” node. Connect it to the trigger. Configure it to call a news API. For example, you can use NewsAPI.org (requires a free API key).
- Method:
GET - URL:
https://newsapi.org/v2/top-headlines?category=technology&country=us&apiKey=YOUR_API_KEY
- Method:
- Process the Data: Add a “Function” node. We’ll write a tiny snippet of JavaScript to extract and format the headline from the API’s JSON response.javascript// Get the first article title from the API response const topHeadline = items[0].json.articles[0].title; const source = items[0].json.articles[0].source.name; // Format the output for the email return [{ json: { message: `Your morning tech brief: “${topHeadline}” (Source: ${source}).` } }];
- Deliver the Result: Add an “Email (SMTP)” node. Configure it with your email provider’s SMTP settings (Gmail, Outlook, SendGrid, etc.). Connect it to receive the
messagefrom the Function node. Set the subject line (e.g., “Your Daily Tech Headline”). - Test & Activate: Click “Execute Workflow” on the Schedule Trigger node. Check your inbox! If it works, toggle the workflow to “Active.” It is now live on your cloud server and will run automatically according to its schedule.
What You’ve Achieved: You have a self-hosted, professional automation platform running independently on the internet. You’ve built a workflow that operates on a schedule without your intervention. This is the core value of proper n8n hosting.
Conclusion & Your Next Automation Leap
You now possess the fundamental knowledge to make an empowered decision about hosting n8n. You understand the trade-offs between local convenience, cloud power, Docker’s consistency, and managed ease. By deploying to a cloud server, you’ve unlocked the true potential of n8n: creating persistent, reliable digital workers.
This foundation enables you to tackle far more sophisticated automations. Imagine not just sending yourself news, but automating entire business processes—syncing data between platforms, generating reports, managing social media, or handling customer onboarding.
Ready to see a powerful, real-world application of this knowledge?
Take the next logical step. Explore how to combine n8n’s hosting power with AI to solve a common creative bottleneck: generating custom images. Our detailed tutorial, “Tutorial: Building Your ‘Image Factory’ with n8n and GPT-Image 1.5,” walks you through creating a complete, automated pipeline. You’ll learn to turn a simple blog title into a unique, SEO-optimized illustration—all triggered from a Google Sheet, powered by AI, and delivered to your CMS. It’s the perfect project to cement your hosting skills and witness the transformative power of end-to-end automation.