One of the biggest challenges for website managers is creating custom illustrations for every blog post. Doing this manually is a time sink. Today, we’ll show you how to use n8n to automate this process 100%.
The Perfect Workflow: From Concept to Creative
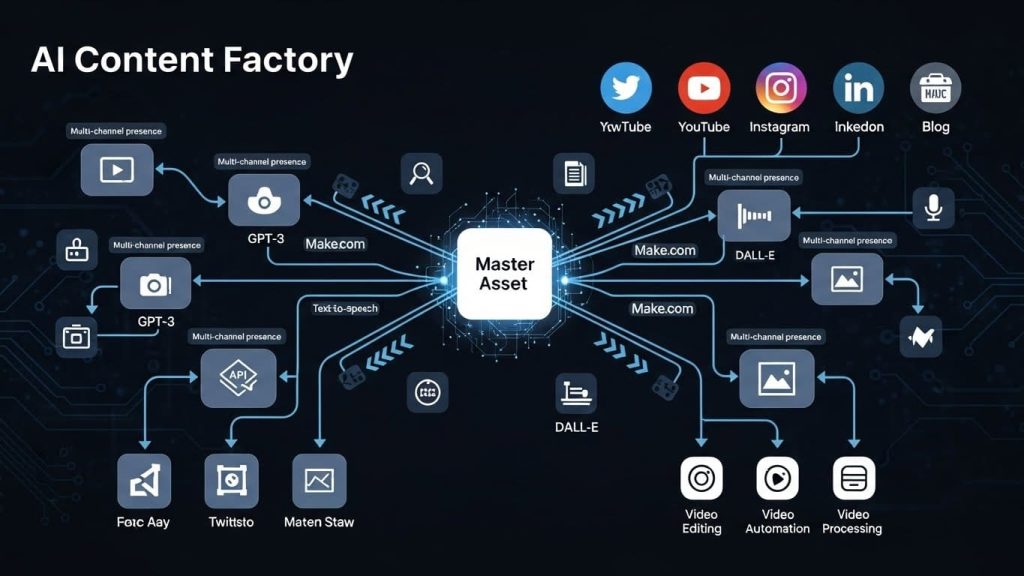
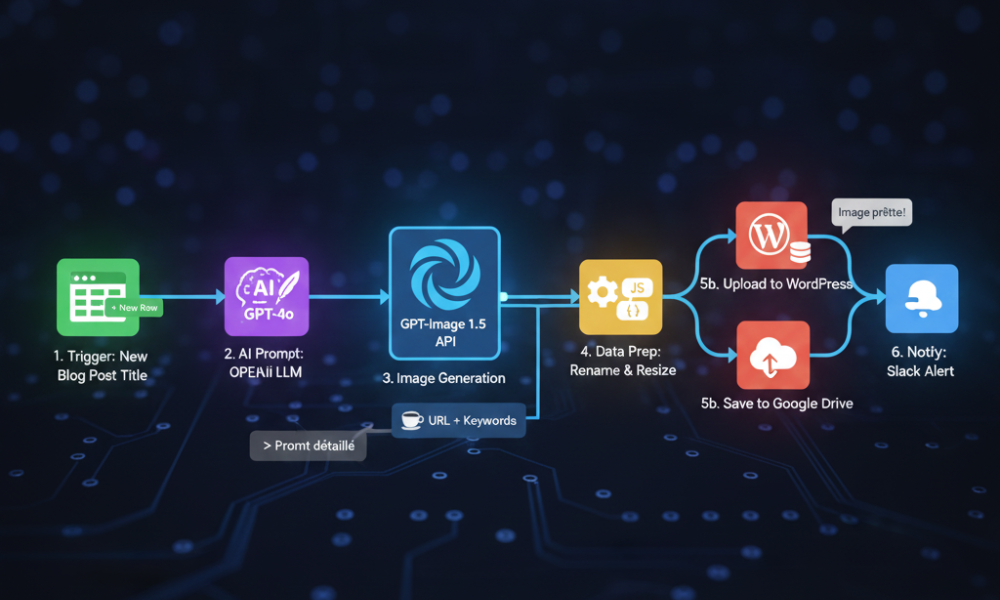
With n8n, you can build a logical tunnel that works while you sleep. Here are the 4 key steps of the workflow we use at aiwiner.com:
1. The Trigger (Google Sheets or RSS)
The flow starts the moment you add a post title to a Google Sheet. n8n monitors this sheet and activates instantly when a new row is detected.
2. AI Prompt Engineering
The title is sent to an “OpenAI” node. The AI transforms your simple title into a highly detailed artistic prompt for GPT-Image 1.5.
- Example: “Post about coffee” becomes “Minimalist photography of a steaming blue coffee bean, professional lighting, 8k.”
3. Generation with GPT-Image 1.5
The optimized prompt is sent to the GPT-Image 1.5 API. n8n waits for the image to be ready, then retrieves the high-definition URL.
4. Storage and Notification
Finally, n8n downloads the image, renames it with your SEO keywords (e.g., best-coffee-2026.jpg), and uploads it to your WordPress media library or Google Drive. You then get a Slack notification: “Image ready for post X!”
Why n8n is the Superior Choice
The magic of n8n lies in the “HTTP Request” node. Unlike other platforms, n8n gives you total control over how you send data to the AI, allowing you to specify format, size, and even apply filters via other APIs before the final upload.
🔗 Liens Internes (SEO Maillage)
- The Main Guide: n8n: The Ultimate Guide to AI Automation
- The Engine: GPT-Image 1.5 vs Nano Banana Pro